Create and Customize Email Templates
If you use a responsive template with a media query in CSS, insert<!--NEWSMAN_RESPONSIVE --> after the <HEAD> tag into the HTML code of the template to disable the WPNewsman internal inliner and keep the template layout unchanged.Watch this quick video guide to learn how to create and edit email templates and messages in WPNewsman.
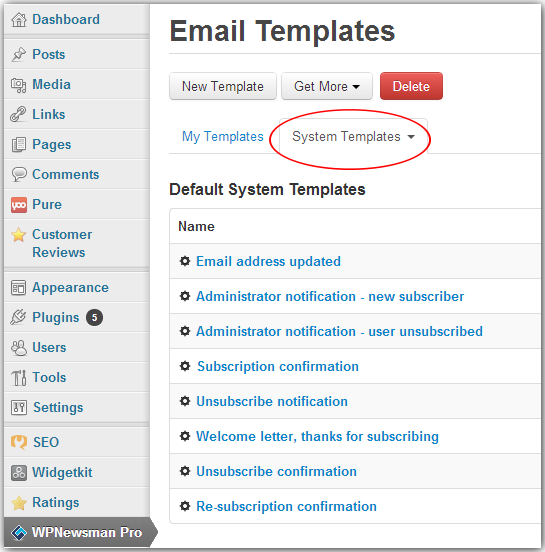
Our WPNewsman plugin is supplied with the Default System Templates used in the double opt-in subscription method. The templates are pre-configured and can be used as is after the plugin installation.
- Administrator notification – new subscriber:
- Subscribe notification email sent to the administrator.
- Administrator notification – user unsubscribed:
- Unsubscribe notification email sent to the administrator.
- Subscription confirmation:
- Email with the confirmation link sent to the user upon subscription.
- Unsubscribe notification:
- Email sent to the user that confirms that his email address was unsubscribed.
- Welcome letter, thanks for subscribing:
- Welcome message sent after the subscriber confirms his subscription.
- Unsubscribe confirmation:
- Email with a link to confirm the subscriber’s decision to unsubscribe.
- Re-subscription confirmation:
- Email with a link to re-subscribe that is sent to ALL “unconfirmed” users on the list.
When you create a new list in WPNewsman, the default system templates are copied to the new list. Click on the list name under “System Templates” to show the templates associated with this list.
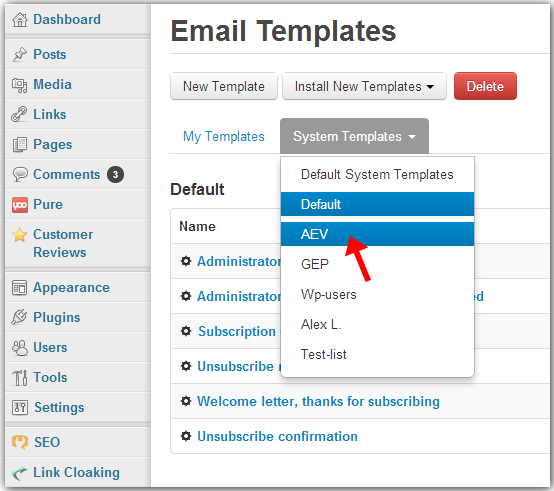
You can edit the templates associated with each list separately and send different email messages to users who subscribe to different lists.
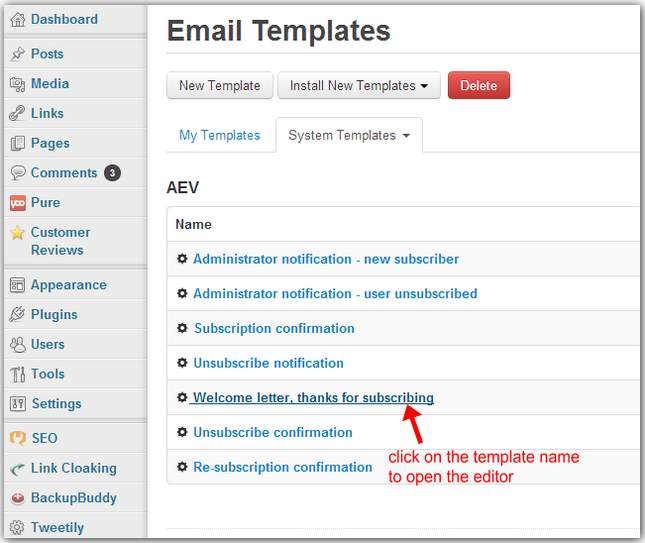
Click on the template name to open the editor window.
In addition to the system templates used in the subscription process, you can create custom templates and use them to design email messages for your subscribers.
Create New Template
Click on “My Templates” tab.
Click on “New Template”.
Enter the template name and type the content. You can click on the Source button on the editor and paste your HTML source here.
To quickly add the unsubscribe link to the message, click on the Newsman button on the editor and select “Unsubscribe”.
To insert the link to an online version of the message, select “View Email Online”.
To save the template, click “Close”.
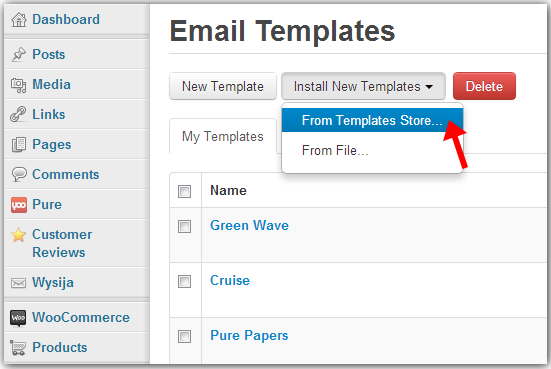
Install the Template from the Templates Store
WPNewsman includes a rich templates store where you can download and install templates from.
Click on the “Install New Templates” button and select “From Templates Store…”.
Choose the templates library – Campaign Monitor or Hot Email Templates.
Click on “Download” under the desired template.
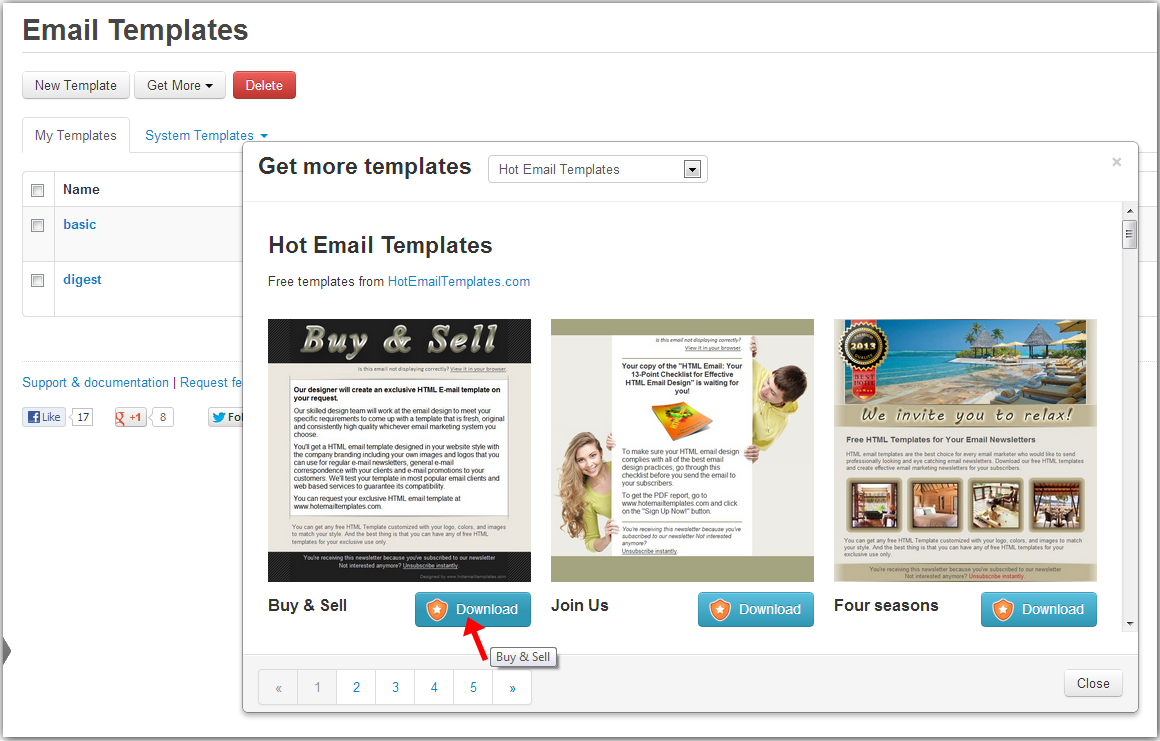
Click on the image to enlarge it
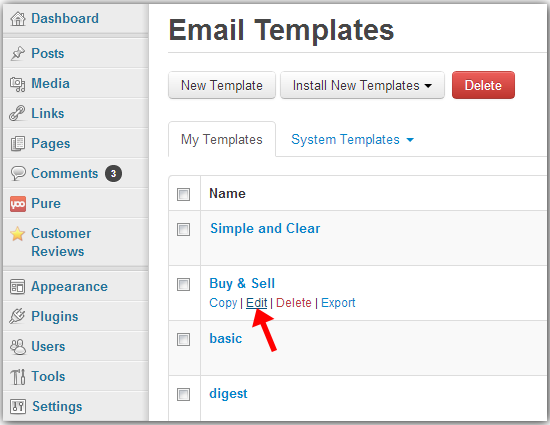
Click “Close” after the template is installed.
Click on “Edit” under the template name to open the editor and modify the template as you want.
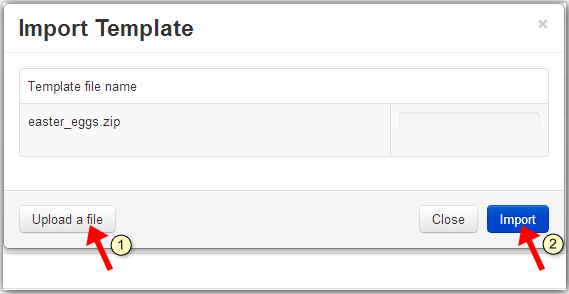
Import Template from File
You can import your own email message from a file and use it as a template in WPNewsman. The import works with .zip files only. The zip file must contain the html file and the folder with the images used in the html file. The html file must have the same name as the zip file. Example: if the zip file is test.zip, the html file inside the zip file must be test.html.
Click on the “Install New Templates” button and select “From File…”.

Click on “Upload a file” button and select the .zip file on the disk.
Click “Import”.
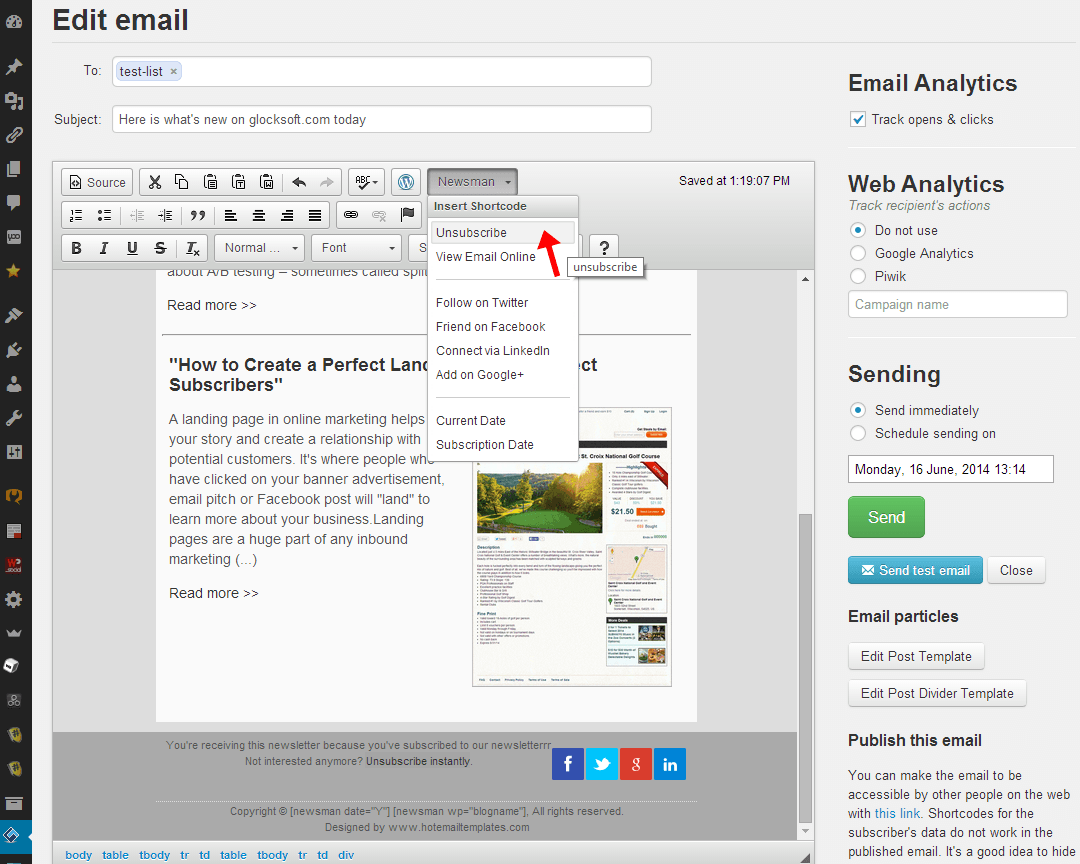
Customize Template
Click on the Edit under the template name to open the editor. Here you can customize the template as you want in order you can quickly create a newsletter using the template.
To insert the posts excerpts into the template, put the mouse in the message body where the first post should start, click on the “Insert Posts” button on the editor, select the posts to insert and click OK.

To quickly add the unsubscribe link to the template, click on the Newsman button on the editor and select “Unsubscribe”.
To insert the link to an online version of the message, select “View Email Online”.
To insert links to your social profile pages, select “Follow on Twitter”, “Friend on Facebook”, “Connect via LinkedIn”, or “Add on Google+”.
To insert the current date into the message, choose “Current Date”.
To insert the user’s subscription date, choose “Subscription Date”. The date will be inserted including the time, for example Fri, 21 Jun 2013 13:56:13
Send Test Email
We highly recommend that you send a test email created from the template to yourself to make sure it displays as it should.
Click “Send test email” at the right side.
Enter your email address.
Click “Send” button.
Export Template
Click on “Email Templates” under WPNewsman in your WordPress admin panel.
Click on “Export” below the template name.
Choose a folder on the disk to save the template .zip file.
Click “Save”.
General Rules for Template Designers and Developers
There are two types of editable blocks: images and html content blocks. The type of block is detected automatically based on the underlying element type. <img /> tags will create an editable image block and other element will create an editable html block. It’s recommended to use <div> elements as underlying for editable html blocks as the editor uses div as the default block element during the switching between block types.
The editable block has one required attribute – "gsedit" with the unique inside the document value – the name of the block.
Example:
<div gsedit="std_preheader_content">
...
</div>
The image block has an additional parameter “placehold” which defines the size of the placeholder image and is set in format of WxH where W is the width and H is the height of the placeholder image in pixels.
Example:
<img placehold="150x80">
You can give the user an opportunity to choose which type of block he wants to use in the place. For that you need to add a “gsblock” attribute with the “image,html” value.
Example:
<div gsedit="some_switchable_block" gsblock="image,html">
...
</div>
If you want to add buttons to the block, assign to the block the gsedit attribute with any value unique for the entire message, for example:
<div gsedit="some_deletable_block"> ... </div>
The template has the particles file. The particles file contains the parts used during the post insertion. The particles file has the same name as the main template file but with the “_” character at the beginning. For example, if the main template file is main.html, the particles file will be _main.html.
The content of the particles file is:
<div gsedit="post_block">
 <div gsedit="post_item">
 </div>
</div>
<div gsedit="post_divider"><img width="551" height="6" src="images/article-spacer-3.jpg" alt=""></div>
The external tags <div gsedit=”post_block”> and <div gsedit=”post_divider”> must be used as is. Inside post_block there is <div gsedit=”post_item”> that must be used too because during the post insertion the plugin searches for the block with this name and adds a number to the name.
When you insert posts excerpts into the template, the plugin searches for the block with id=”posts_container” and inserts posts excerpts into this block. If such a block is not found, the plugin inserts posts excerpts at the place where the cursor is put.There is a new short code [newsman_has_thumbnail] which works only when the post contains a picture.
  <!-- [newsman_has_thumbnail] ->
  <img width="325" alt="[newsman post='post_title']" src="[newsman post='thumbnail' placeholder='images/325x146.gif']" style="float:left; border: 10px solid #ffffff; margin-right: 10px;">
  <!- [/newsman_has_thumbnail] -->